What Happens When You Click Play? Inside the Browser Video Pipeline (Complete Technical Guide)

Clicking the “Play” button on a video seems like a simple action. Within milliseconds, motion appears on your screen and audio begins playing. But behind that single click lies one of the most complex real-time processing pipelines in modern web technology.
From network requests and manifest parsing to decoding, buffering, rendering, and synchronization, a browser executes dozens of coordinated steps before video playback begins.
Understanding what happens inside the browser video pipeline helps developers, streaming engineers, and content creators optimize performance, improve user experience, and diagnose playback issues.
In this complete guide, we’ll explore:
- What triggers video playback in the browser
- The network request sequence
- How adaptive streaming is handled
- Media Source Extensions (MSE)
- Buffering and decoding
- GPU rendering
- Audio synchronization
- Security and sandboxing
- Performance optimization techniques
Let’s step inside the browser.
Step 1: The Play Event Is Triggered
When a user clicks “Play” on an HTML5 video player, the browser triggers a JavaScript event tied to the <video> element.
This event initiates:
- Media loading (if not already preloaded)
- Network requests
- Buffer allocation
- Playback state changes
If autoplay is enabled, this process may begin automatically when the page loads.
At this stage, the browser checks:
- Is the media source valid?
- Is the format supported?
- Are user interaction requirements satisfied (for autoplay policies)?
Only after these checks does the media pipeline begin execution.
Step 2: Resolving the Media Source
The browser determines what type of media it is about to load.
There are three common scenarios:
1. Progressive MP4 File
The browser downloads a single media file.
2. HLS (M3U8) Stream
The browser (or JavaScript engine) loads a playlist file.
3. MPEG-DASH (MPD) Stream
The player loads a manifest describing adaptive segments.
If adaptive streaming is involved, the browser does not immediately download video segments. Instead, it first retrieves a manifest file that describes available qualities.
This step ensures intelligent quality selection.
Step 3: DNS Resolution & Network Connection

Before downloading video data, the browser must establish a network path.
The following happens:
- DNS lookup resolves the domain name.
- TCP connection is initiated.
- TLS handshake occurs (if HTTPS is used).
- HTTP request is sent to the server or CDN.
Modern browsers optimize this using:
- Connection pooling
- HTTP/2 multiplexing
- HTTP/3 (QUIC)
- Preconnect hints
Reducing connection setup time improves video startup speed.
Step 4: Manifest Parsing (Adaptive Streaming Only)
If the source is HLS or DASH:
- The browser (or JavaScript library) downloads the manifest.
- It parses available representations.
- It evaluates:
- Bitrates
- Resolutions
- Codecs
- Segment durations
- Audio tracks
At this point, adaptive bitrate logic selects an initial quality level.
The decision is based on:
- Estimated network speed
- Device screen resolution
- CPU capability
- Buffer size
The browser now knows which video segments to request first.
Step 5: Media Source Extensions (MSE) Activation
For DASH and most HLS playback in non-Safari browsers, the Media Source Extensions (MSE) API is activated.
MSE allows JavaScript to:
- Fetch video segments
- Append them dynamically to a media buffer
- Switch quality during playback
Without MSE, adaptive streaming would not be possible in most browsers.
MSE creates a SourceBuffer object that manages media data inside the browser’s memory.
Step 6: Segment Downloading Begins
Instead of downloading an entire video file, the browser requests small segments.
Typical segment size:
- 2–6 seconds of video
Each segment is:
- Retrieved via HTTP
- Stored temporarily in memory
- Appended to the buffer
The browser continues requesting segments as long as playback continues.
This segmented approach allows:
- Adaptive bitrate switching
- Efficient bandwidth usage
- Fast seeking
Step 7: Demuxing the Media Container
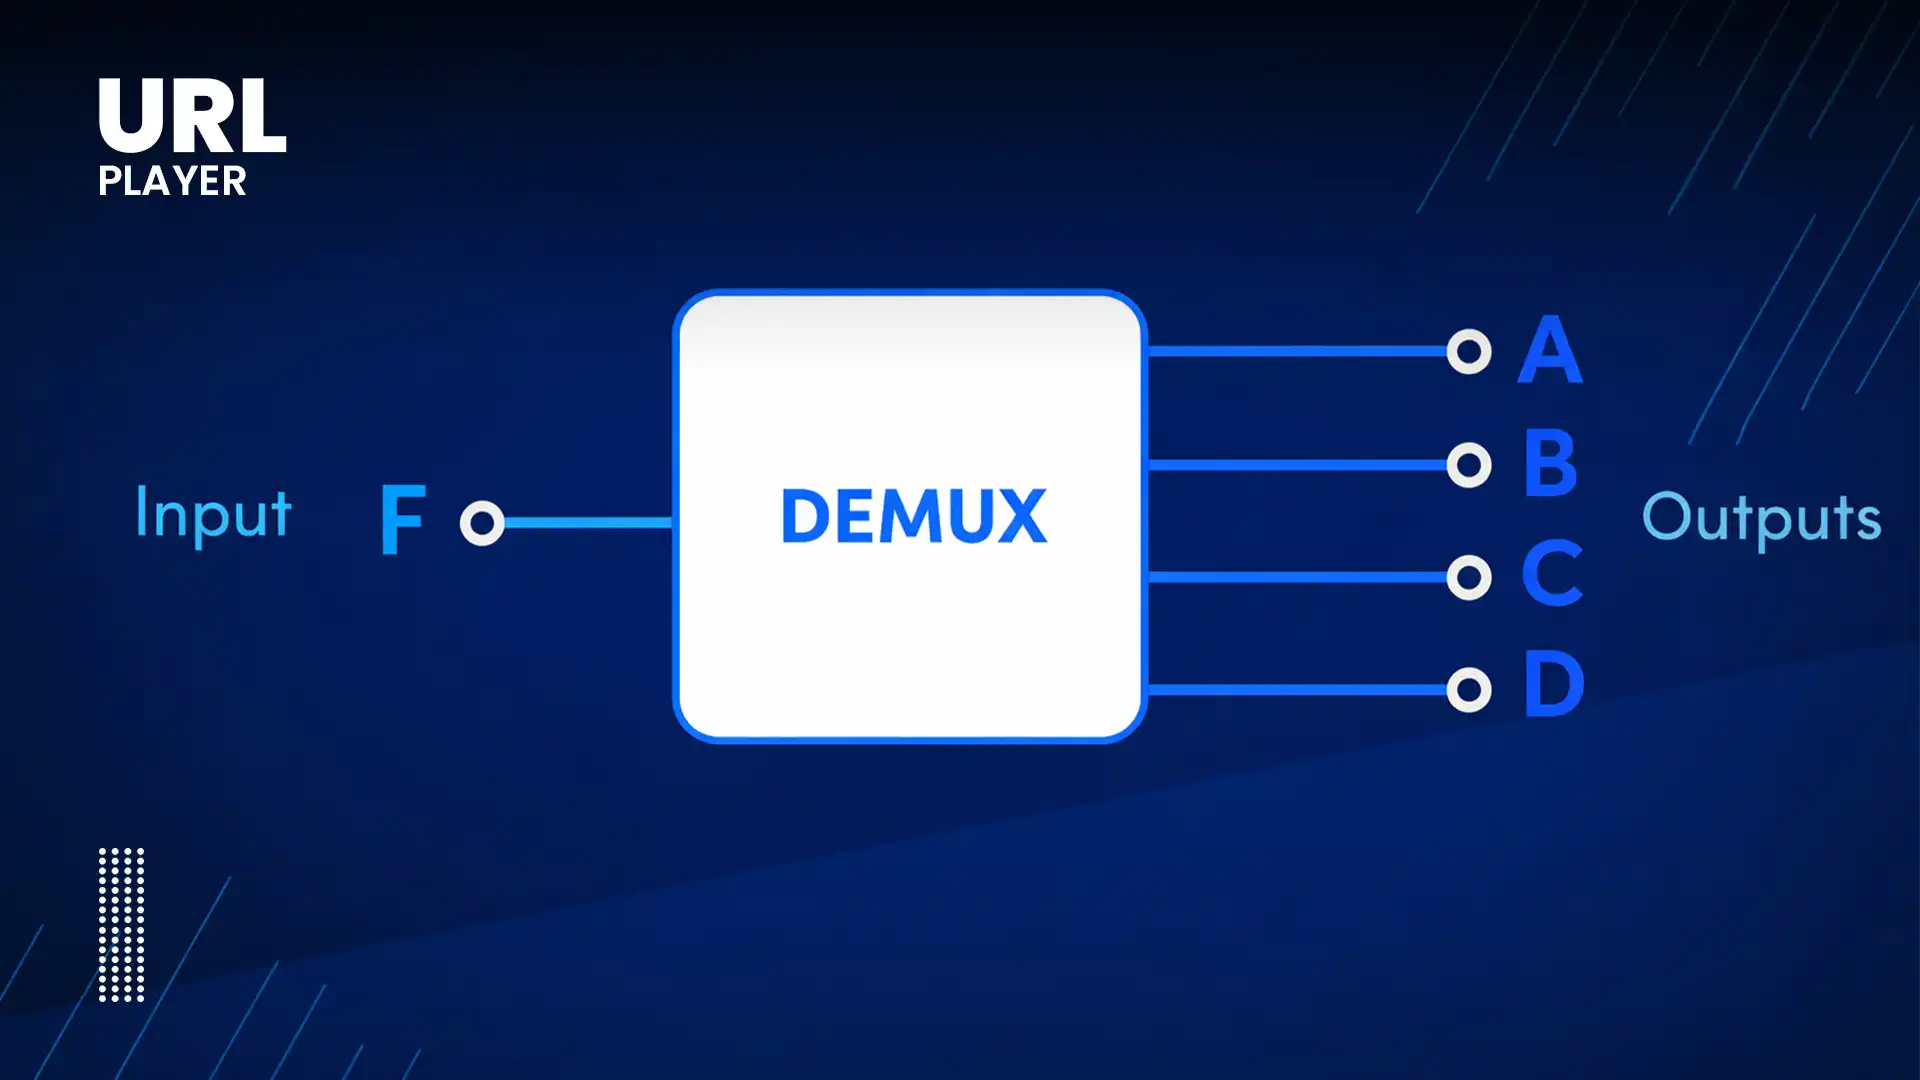
Video files are stored in containers like:
- MP4
- fMP4
- WebM
The browser must extract:
- Video track
- Audio track
- Subtitle track
- Metadata
This process is called demuxing (demultiplexing).
The demuxer separates the streams so they can be decoded independently.
Step 8: Decoding the Media Streams
Decoding is one of the most performance-intensive steps.
The browser sends compressed video frames to a decoder.
Modern browsers use:
- Hardware acceleration (GPU decoding)
- Dedicated media decoding chips
- OS-level codec support
Common codecs include:
- H.264
- H.265 (HEVC)
- VP9
- AV1
Hardware acceleration reduces:
- CPU usage
- Battery drain
- Thermal output
Without hardware decoding, playback would consume excessive resources.
Step 9: Buffer Management
The browser maintains a buffer — a short segment of preloaded video.
Typical buffer size:
- 10–30 seconds (varies by platform)
The buffer ensures:
- Smooth playback
- Reduced buffering events
- Stability during network fluctuations
If the buffer runs low due to slow internet, playback may pause.
Adaptive streaming may reduce quality to refill the buffer faster.
Step 10: Rendering Video Frames
Once decoded, video frames are sent to the rendering pipeline.
This involves:
- GPU composition
- Frame scheduling
- Color space conversion
- Scaling to fit screen resolution
The browser synchronizes frames with the display refresh rate (usually 60Hz).
Each frame must be rendered at precise intervals.
Dropped frames result in stutter.
Step 11: Audio Processing and Synchronization
What Happens When You Click Play? Inside the Browser Video Pipeline.
Audio decoding occurs alongside video decoding.
The browser must ensure:
- Lip-sync accuracy
- Low latency
- Stable playback
Audio and video clocks are synchronized using internal timing systems.
If sync drifts, the browser adjusts:
- Frame timing
- Playback speed (slightly)
- Buffer alignment
Synchronization errors can cause noticeable playback issues.
Step 12: Adaptive Bitrate Switching During Playback
While video plays, the browser continuously monitors:
- Network throughput
- Buffer health
- CPU usage
If bandwidth decreases:
- The player switches to a lower bitrate segment.
If bandwidth increases:
- Higher quality segments are requested.
Switching happens seamlessly between segments.
Users rarely notice quality transitions.
Step 13: DRM Decryption (If Enabled)
If DRM is used:
- The browser uses Encrypted Media Extensions (EME).
- It communicates with a license server.
- Decryption keys are temporarily stored.
- Video segments are decrypted inside secure memory.
DRM prevents:
- Raw file access
- Unauthorized downloads
- Screen scraping (to some extent)
Decryption occurs in secure browser environments.
Step 14: Security and Sandboxing
Browsers run video playback in isolated processes.
Security mechanisms include:
- Process sandboxing
- Memory isolation
- Secure decoding paths
- CORS restrictions
This prevents video playback from accessing:
- File system
- User credentials
- Other browser tabs
Security is built into the architecture.
Step 15: Continuous Optimization
Modern browsers optimize playback using:
- Lazy loading
- Prefetching
- Memory cleanup
- Garbage collection
- Hardware resource allocation
These background optimizations maintain performance even during long sessions.
What Can Go Wrong?
Understanding the pipeline explains common issues:
Slow Startup
- DNS delays
- TLS handshake latency
- Large manifest files
Buffering
- Poor network conditions
- Insufficient buffer size
- CDN congestion
Playback Errors
- Unsupported codec
- DRM misconfiguration
- CORS restrictions
High CPU Usage
- No hardware acceleration
- Inefficient codec
- Large resolution on low-end device
Diagnosing these issues requires understanding the entire pipeline.
Why This Pipeline Matters?
For developers and streaming engineers, understanding the browser video pipeline enables:
- Faster startup times
- Better buffering strategies
- Efficient encoding decisions
- Improved adaptive bitrate logic
- Enhanced user experience
Video playback is not just file loading — it’s a coordinated real-time system.
The Future of the Browser Video Pipeline
Upcoming innovations include:
- Low-latency streaming improvements
- WebCodecs API integration
- WebTransport protocols
- AI-driven bitrate selection
- More efficient codecs like AV1
Browsers continue evolving to handle higher resolutions, lower latency, and improved security.
Conclusion
Clicking “Play” on a video initiates a sophisticated chain of processes inside your browser. From DNS resolution and manifest parsing to hardware decoding and GPU rendering, the browser orchestrates dozens of coordinated operations to deliver seamless video playback.
Understanding the browser video pipeline reveals why performance, encoding quality, adaptive streaming, and secure delivery all matter.
Behind every smooth streaming experience lies an intricate real-time system — and mastering it is essential for anyone building modern video platforms.